


Recording your screen with the perfect audio can be a challenge. You want it to be clear and comprehensive for whoever uses it, but it seems like a tough job.
Since screen recording captures our visual and auditory senses to grab attention, that’s why it needs to be of the highest quality. In this article, we’ll briefly discuss the Wondershare DemoCreator screen recorder with audio and include step by step process enabling you to learn screen recording without compromising the sound.
Recording Screen with Audio Using Wondershare DemoCreator
Before we dive into the process, know that it’s an easy video editing software and serves as a robust tool for amateur and professional visual content creators.
It’s a lightweight software that makes it an ideal option for Windows users. The screen recorder for pc also lets you capture a live visual project and an already recorded visual clip.
Also, the software comes with stunning recording features with audio editing options, such as audio fade in and fade out, audio denoise, and more.
Why Do You Need to Record a Screen with Audio
There could be various reasons to record your screen with audio, such as:
For Marketing and Teaching Purpose
Screen recording enables you to capture all types of content, including video, texts, music, graphics, etc.
And when it comes to telling a captivating story about your company, you can think about screen recording to get the job done efficiently as it makes the information easy to understand.
On the flip side, the audience also enjoys watching videos recorded from a screen and doesn’t hesitate to share them on their social profiles.
This factor makes it a decent option to get your point across to the audience without putting in significant effort.
For Productivity Purpose
In-person or virtual meetings take most of our time. It has remained a concern, especially among the business sector, where time spent on meetings impacts productivity.
You can fix it by opting for screen recording. This strategy allows you to take advantage of real-time collaboration as a reliable resource for information to boost productivity.
Implementing this strategy will enable you to record business-related calls and meetings to use again whenever you want them.
This factor makes it essential to learn screen recording with clear and crisp audio.
How to Record Screen with Audio
If you’re struggling to record a screen with audio, you can follow a simple step-by-step process.
Step 1: Download and Install the Software
You need to download Wondershare DemoCreator to initiate the process. Once you’re done with it, select the “.exe” file to install DemoCreator.
Step 2: Launch Software and Create your Account
Installing DemoCreator doesn’t take additional time. It’ll occur automatically. You only need to launch it, so click on the “get started” option and start registering your account.
Step 3: Select your Desired Option
The software will show a different screen with options, such as start a record project, video editing, record screen, virtual human, record game, and schedule.
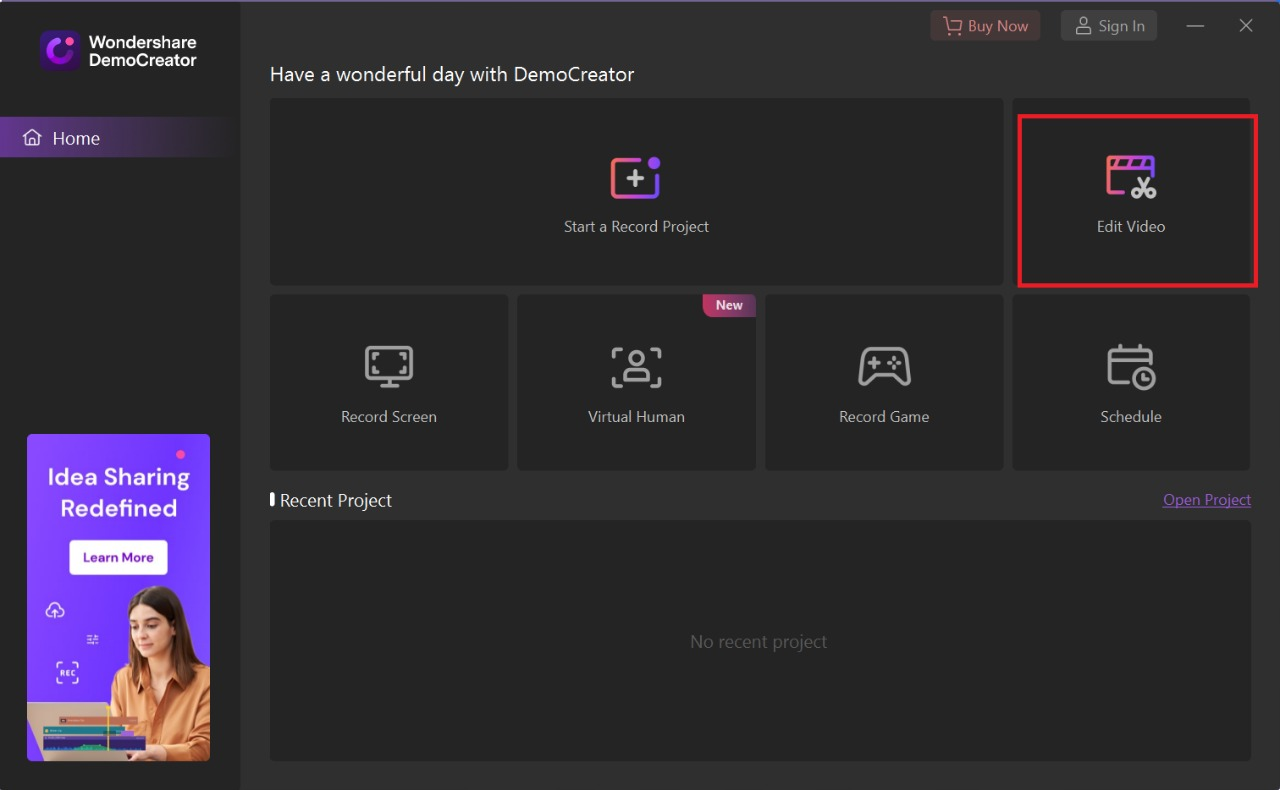
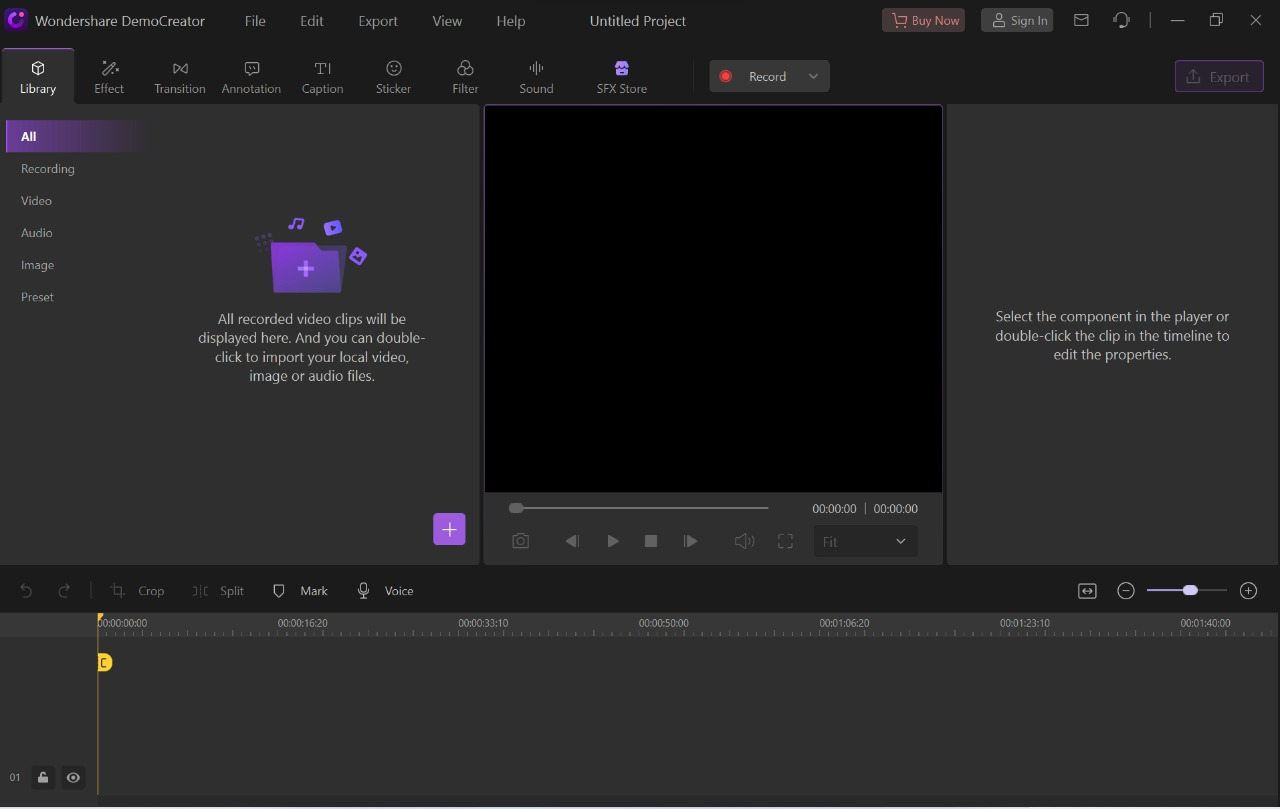
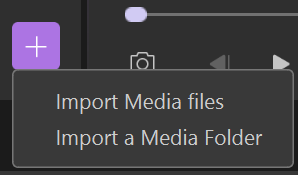
If you have a pre-recorded video, you can choose “video editing.” Then it’ll open an editing window where you can import the saved visual clip from the library by clicking on the “plus” button.
However, if you don’t have a pre-recorded video and aim to record a screen, such as any presentation or game, you can do it by selecting options record game or record screen, etc.
Once you decide on the screen you want to record, you will see an interface with options, including capture area, system audio, microphone, and webcam with the “record” button in red.
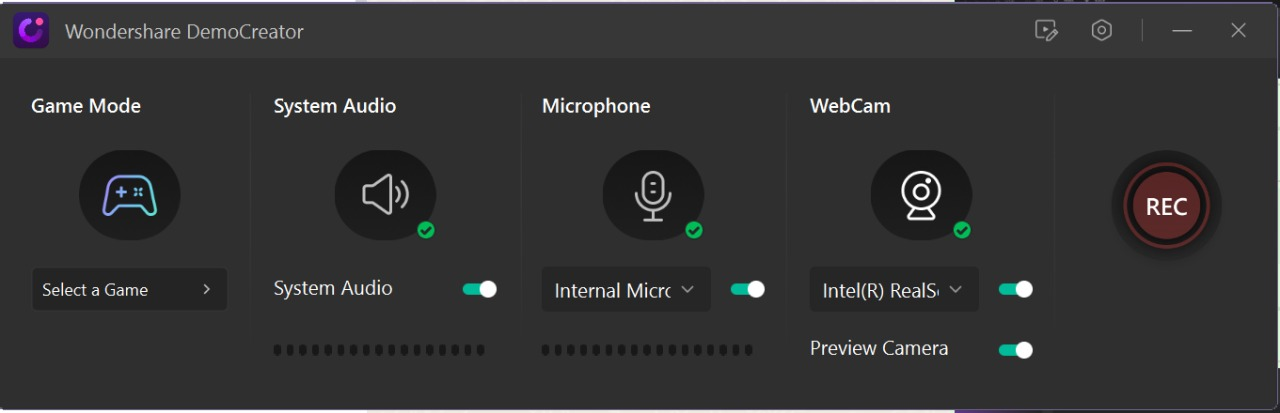
You can adjust these options as per your requirement and initiate recording.
Step 4: Record Settings Customization
At this point, this futuristic screen and voice recorder allow you to customize settings. The settings button is located at the top corner of the screen.
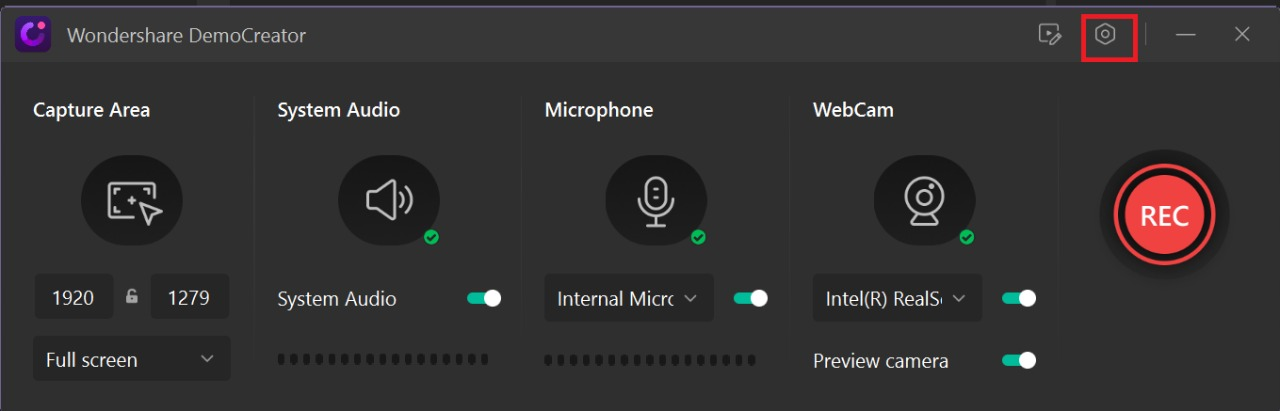
When it comes to recording screen activities with the sound together, it’s better to opt for customization options, such as camera, screen, audio, and advanced options.
On your Windows PC, you can customize the capturing area by clicking on “screen” and setting the “Frame Rate” up to 120FPS.
What if you want to record gameplay? Well, this screen recorder with audio has got you covered. You can record it by simply selecting the “game.”
Moreover, you can set the audio source for your visual clip and choose from “microphone” or “computer audio.” And if you want, you can choose both.
Wondershare DemoCreator also lets you record your clip through a webcam. You only need to choose the camera you want, the “frame rate” and “resolution.”
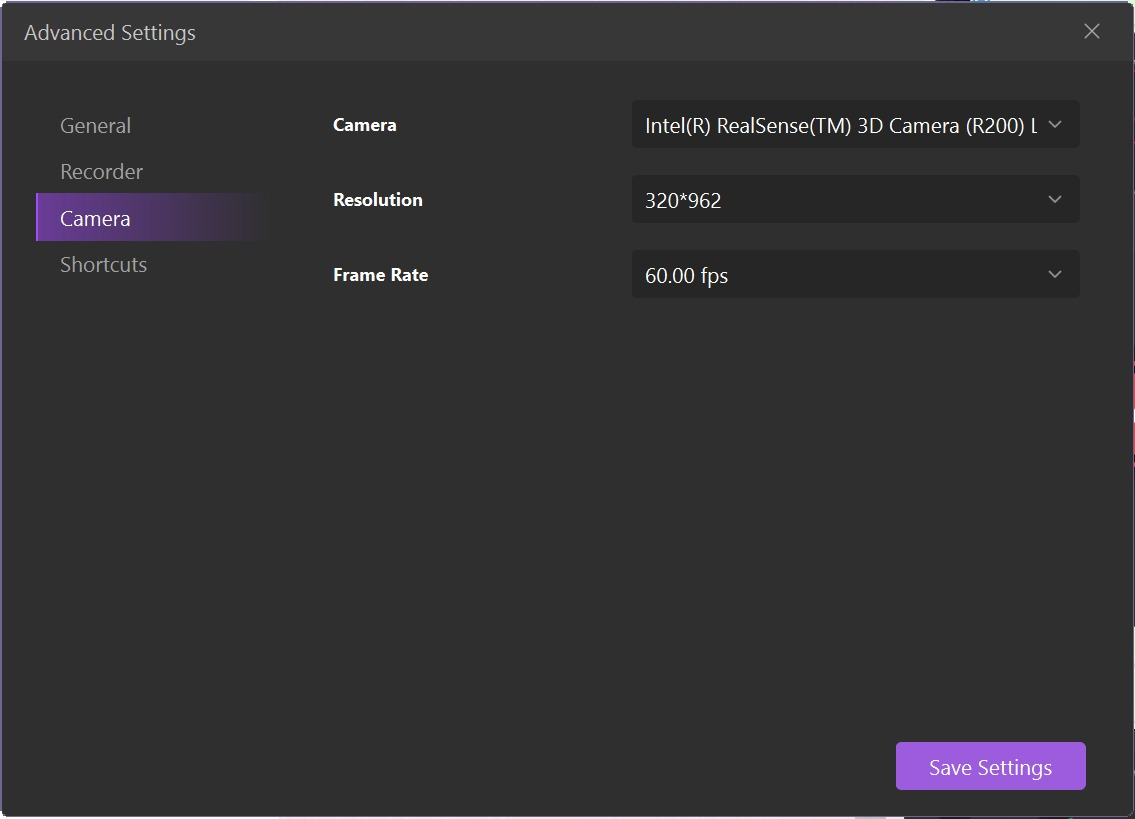
Using the advance section, you can set the path for the recorded video. It allows you to enable or disable “GPU acceleration” and select the convenient “hotkeys.”
Once you finish customization using the “capture” option, you will start the recording console.
Step 5: Easy Screen Recording
You can find the “record” utility at the top of the recording console and start recording your screen’s audio and video by clicking it. The recording will start after a short countdown.
Additionally, the “F9” key pauses and resumes the recording, whereas the “F10” key stops the video.
This screen and audio recorder make the entire recording process smooth and hassle-free. But if you ever struggle with audio, here’s how you can fix it.
How to Edit Audio
Follow this step-by-step guide to editing audio using Wondershare DemoCreator.
Step 1: Import Media File
You can record a new audio file or edit the audio of a pre-recorded audio. Click the “open file” and access the required file to import your file.
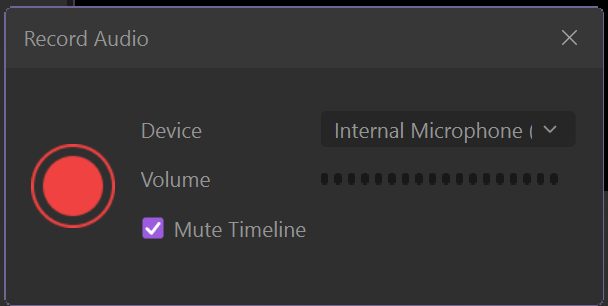
To record the audio on spot click on “Voice” from the menu bar right above the timeline section.

A pop up will open where you can record the audio.
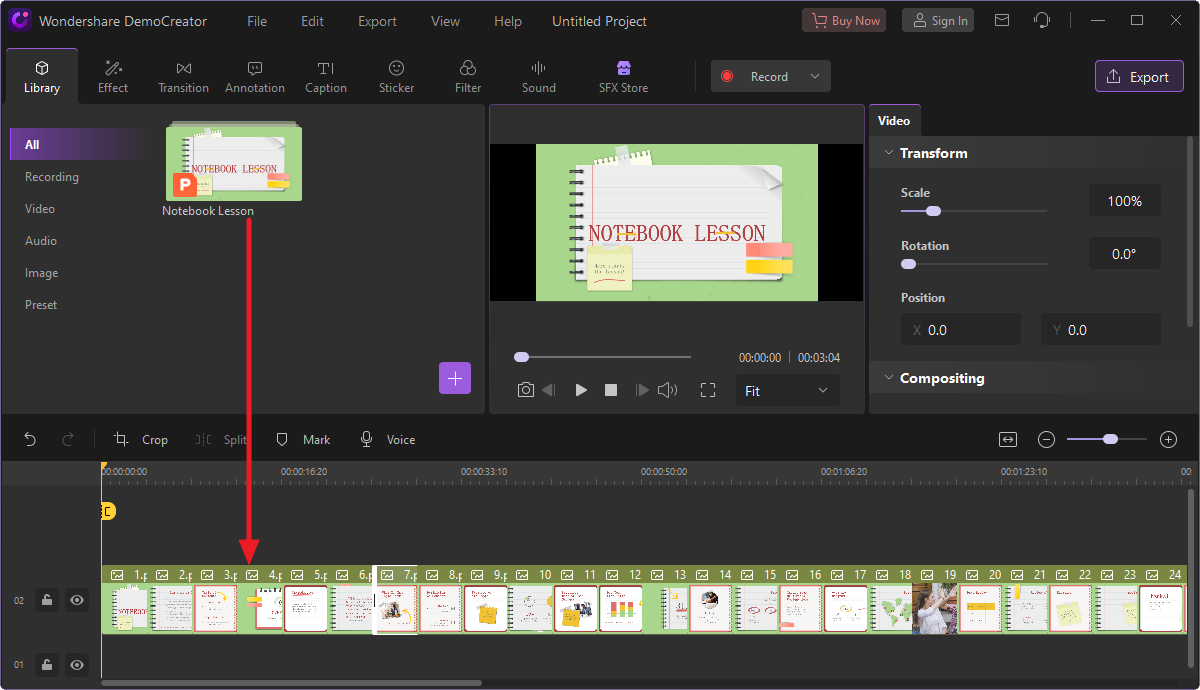
Step 2: Drag and Drop the File into the Timeline
Once you decide on the file you want to import from your computer; you need to drag and drop them into the software’s timeline and begin editing the audio.
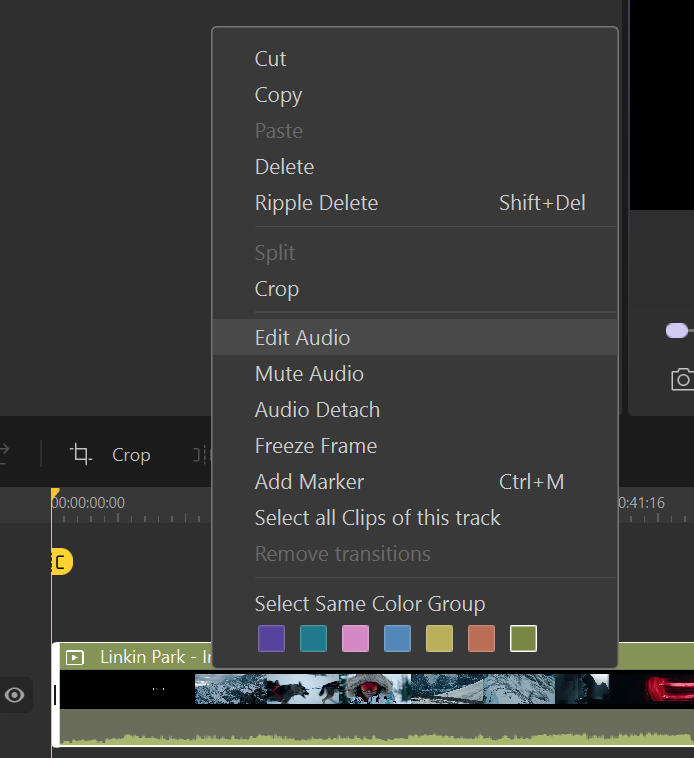
Step 3: Edit your Audio
Select the track by moving your mouse over the thumbnails of the audio file. Then you need to right-click the audio to access the drop-down menu and select “edit audio” from it.
Step 4: Adjust Fade-in and Fade-out Duration
Fade-in and fade-out options are essential when editing an audio clip. Adjusting fade-out makes the sound softer while fading away until you don’t hear it.
Therefore, set the fade-in or fade-out, drag your mouse over the audio, push the slider bar to the right or left, decide the start time and duration you want it to go.
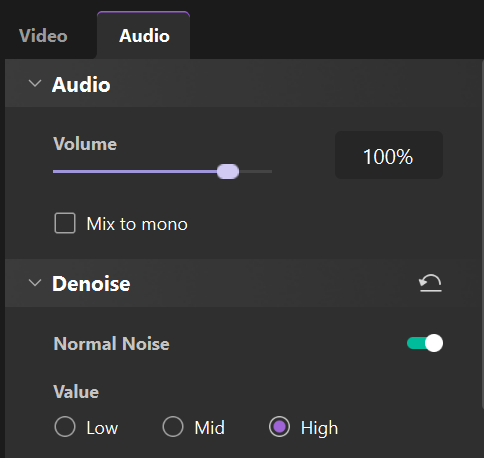
Step 5: Enable Audio Denoise
When you access the denoise tab in the software, it will allow the extent of audio noise cancellation. You can find the specific value settings in the same tab.
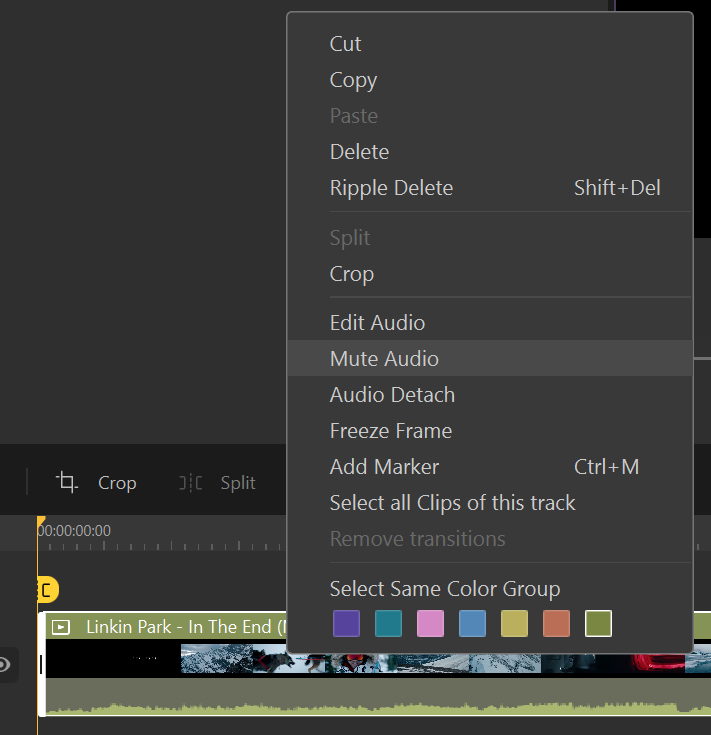
Step 6: Mute Sound from the Audio
The process of muting the audio is simple. You’ve opened the file in the timeline; simply right-click on it and select the option “mute.” This way, you will remove the sound from your clip.
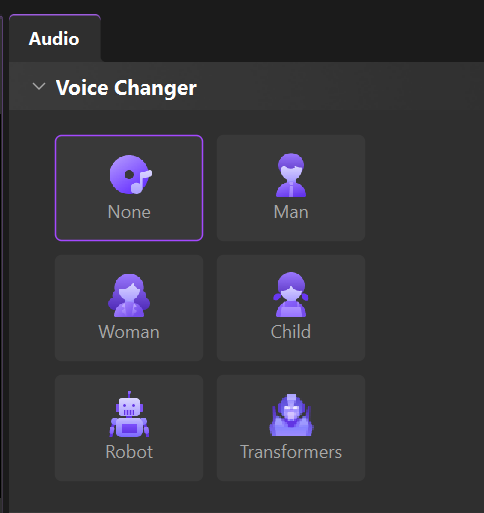
Step 7: Change Voice in your Audio
The futuristic software enables you to stay anonymous in the online era. Now, you can add an incredible voice to your audio files using the voice changer.
You can find the option in the audio part below the denoise option. Voice changer comes with different options, such as male, female, robot, and transformers.
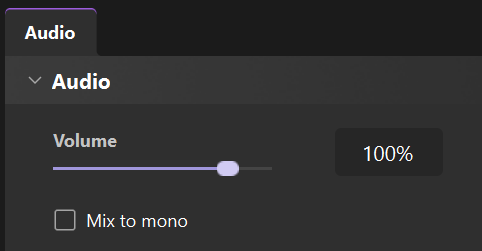
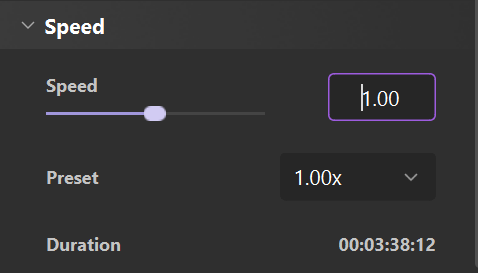
Step 8: Adjust Audio Speed and Volume
After exploring different audio options, you can also choose the speed and volume of the audio clip. Simply go to the “editing properties” to adjust the volume of the audio file and select the “audio panel” of the specific audio clip.
Then choose the “volume” setting, set to 50 by default. To increase the volume, adjust it to the right or move it to the left to lower the volume.
More so, the “time stretch” feature is responsible for controlling the speed. DemoCreator allows you to stretch or contract the audio according to your requirements.
So click on the “speed settings” and decide the speed percentage. Also, you need to decide the duration at which you want to apply the specific setting.
Step 9: Export and Share your Audio
At this point, you’re done with the audio editing process, and it’s time to export your file. Now, you need to select a name for your audio file and save it as an exported file.
Know that you can adjust its sample rate, bit rate, and channel according to your requirements. And finish it by clicking the “export” button given at the bottom of the screen.
Save your file to your computer, and feel free to share your file to any social media medium.
Conclusion
Recording the screen with audio may sound like a time-consuming and challenging process. But with the help of intuitive software like Wondershare DemoCreator, you can ace it.
The software allows you to edit audio with different fantastic options. The steps are simple and easy to follow. Once you learn, you might stop dreading audio editing.
With its easy-to-navigate interface and advanced settings, DemoCreator can become your go-to video or audio editing software that keeps you on the top of your editing!

Thomas Jackson is a dynamic and talented content writer at WonderWorldSpace.com, renowned for his engaging and informative articles. Beyond his professional pursuits in writing, Jack is also known for his deep passion for fitness, which not only shapes his lifestyle but also influences his work.